
Rainbow Six Siege Tips & Guides: How to Master Map Control, Operator Synergy, and Tactical Decision-Making

Rainbow Six Siege is one of the most demanding tactical first-person shooters because success depends on far more than accurate shooting. Every round combines environmental destruction, operator abilities, information gathering, positioning, communication, and precise timing. Unlike traditional shooters that reward constant aggression, Rainbow Six Siege challenges players to understand the battlefield, predict enemy movements, and make intelligent decisions under pressure.
Many players struggle to improve because they focus primarily on eliminating opponents rather than understanding why certain engagements succeed or fail. Winning consistently requires a deeper understanding of how attackers establish control, how defenders manipulate information, and how both teams use limited resources to create favorable situations. A single poorly positioned drone, wasted utility charge, or unnecessary rotation can determine the outcome of an entire round.
This comprehensive Rainbow Six Siege Tips & Guides article focuses on mastering map control, operator coordination, and tactical decision-making throughout every stage of a match. From preparing your operator lineup to executing coordinated attacks and defending difficult post-plant situations, these strategies will help you develop a more structured approach to competitive gameplay.
1. Understanding Tactical Fundamentals Before Entering a Match
Rainbow Six Siege rewards players who approach every round with a clear tactical objective. Before developing advanced strategies, players must understand the relationship between information, positioning, and resource management. These three elements determine how effectively a team controls engagements and responds to unexpected situations.
Information allows players to identify threats before exposing themselves. Positioning determines whether they can capitalize on that knowledge, while resource management ensures they have the necessary tools to execute their plans. A team with excellent mechanical skill can still lose against opponents who consistently make better decisions in these areas.
Successful players also recognize that every action carries an opportunity cost. Spending thirty seconds clearing an unnecessary room, using an explosive gadget against a minor obstacle, or holding an angle that contributes nothing to the objective can weaken the team's overall strategy.
Developing a tactical mindset
Instead of entering every round with the goal of collecting eliminations, focus on creating favorable conditions for your team.
Important tactical principles include:
- Information advantage: Identify enemy positions before committing to engagements.
- Map control: Secure important rooms, corridors, and entry points.
- Utility efficiency: Use operator gadgets only when they create meaningful advantages.
- Time management: Complete objectives before the round timer becomes a problem.
- Team coordination: Ensure individual actions support the overall strategy.
- Risk evaluation: Avoid unnecessary fights when maintaining control is more valuable.
These principles apply to both attacking and defending, although each side uses them differently.
Recognizing the value of survival
Surviving an engagement can sometimes be more valuable than securing an elimination. A defender who delays attackers for forty seconds without dying may contribute more than a teammate who gets one early elimination but immediately loses an important position.
Similarly, an attacker carrying the defuser should avoid unnecessary risks when teammates are preparing to establish a safe planting position.
Practical training objective
During your next ten matches, evaluate every death by asking three questions:
- What information did I have before the engagement?
- Was my position necessary for the team's objective?
- Could I have achieved the same result with less risk?
This approach gradually transforms reactive gameplay into deliberate tactical decision-making.
2. Selecting Operators Based on Team Composition and Objective Requirements
Operator selection is one of the most important decisions in Rainbow Six Siege because it determines which tactical options remain available throughout the round. Choosing an operator solely because of weapon preference can create serious weaknesses, especially when the team lacks essential utility.
A successful attacking lineup typically needs reliable methods for gathering information, dealing with defender gadgets, creating entry opportunities, and controlling important areas. Defensive compositions must consider site protection, entry denial, information gathering, and the ability to delay attackers.
Operator effectiveness also depends heavily on the selected map and objective location. An operator who performs exceptionally well on a site with reinforced exterior walls may provide less value when attacking a location that requires extensive vertical control.
Building an effective attacking lineup
An organized attacking team should distribute responsibilities instead of selecting five operators who perform similar functions.
Common attacking roles include:
- Hard breacher: Opens reinforced walls or hatches using operators such as Thermite, Hibana, or Ace.
- Support operator: Helps overcome electronic denial or other defensive utility.
- Entry attacker: Takes early engagements and establishes initial map control.
- Information specialist: Uses drones or specialized gadgets to locate defenders.
- Flex operator: Adjusts to unexpected defensive strategies and fills tactical gaps.
For example, Thermite can create a large opening in a reinforced wall, while Thatcher may help disable electronic gadgets where his equipment is available and appropriate.
However, these combinations are not automatically effective. Defenders can use positioning, utility placement, and alternative denial methods to complicate an otherwise straightforward breach.
Creating a balanced defensive composition
Defensive lineups should balance operators who protect the objective with those who influence the surrounding map.
A typical composition might include:
- Mute for electronic disruption and information denial.
- Smoke for delaying entry into critical areas.
- Jäger for protecting positions against certain incoming projectiles.
- Valkyrie for gathering information through camera placement.
- Bandit or Kaid for reinforced-wall denial.
These operators provide complementary capabilities, but teams should adapt their selections to the specific objective.
Avoiding common operator-selection mistakes
One common mistake is choosing too many roaming defenders without maintaining sufficient protection around the objective. Another is selecting multiple aggressive attackers while ignoring the tools needed to open reinforced walls.
Advanced recommendation: Before confirming your operator, identify the most important tactical capability your team currently lacks.
A balanced lineup usually creates more reliable opportunities than a collection of individually powerful operators.
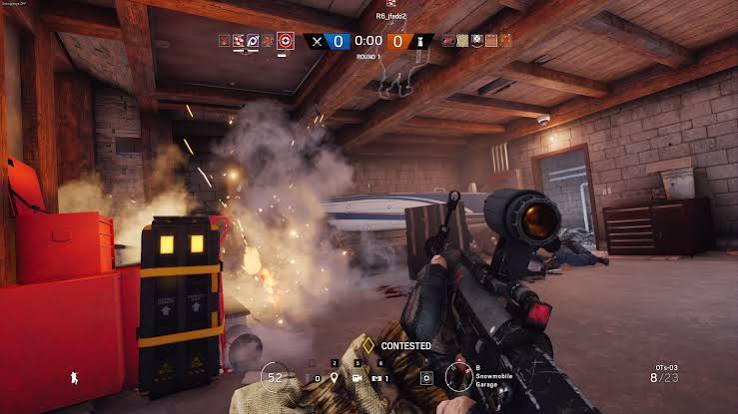
3. Mastering the Preparation Phase Through Intelligent Information Gathering
The preparation phase establishes the foundation for the entire round. Attackers use drones to identify the objective, locate defenders, and investigate possible entry routes. Defenders reinforce critical surfaces, deploy gadgets, and establish their initial positions.
Although preparation time is limited, its strategic importance is enormous. Poor preparation often forces players to improvise during the action phase, increasing the likelihood of wasted utility and unfavorable engagements.
The most effective players treat preparation as a structured information-gathering process rather than a period of random movement.
Using attacking drones efficiently
Attacking drones are valuable because they allow players to gather information without exposing their operators to direct danger.
Instead of immediately driving a drone into the objective room, consider investigating the surrounding areas.
Useful drone objectives include:
- Confirming the objective location.
- Identifying important defender operators.
- Checking likely entry routes.
- Locating defensive gadgets.
- Finding roaming defenders.
- Preserving drones for later use.
Saving a drone near an important entry point can provide immediate information when the action phase begins.
Understanding drone preservation
Many inexperienced players sacrifice their drones simply to identify the objective, even when teammates have already discovered it.
This creates a significant disadvantage because attacking teams rely on drones throughout the round to clear rooms and verify enemy positions.
A preserved drone can later identify a defender holding a dangerous angle or reveal whether a critical room is safe to enter.
Advanced drone technique
Position a drone in a concealed location overlooking an important corridor. When the action phase begins, check the feed before entering the building.
However, avoid repeatedly scanning enemies when doing so would unnecessarily reveal the drone's presence.
Preparing defensive positions efficiently
Defenders should use preparation time to establish a coherent defensive structure.
Important tasks include:
- Reinforcing strategically important walls.
- Creating planned rotation routes.
- Deploying cameras and electronic gadgets.
- Establishing safe positions around the objective.
- Preparing vertical openings where appropriate.
- Coordinating which teammates will roam.
Not every wall should be reinforced. Some walls must remain destructible to support rotations, lines of sight, or defensive escape routes.
Practical tip: Learn the standard site setups for each map before experimenting with unconventional reinforcements.
4. Establishing Safe Entry Routes During the Opening Attack
The opening phase of an attack is often where rounds begin to fall apart. Players may rush through doors without information, enter from disconnected locations, or become trapped by defenders controlling nearby rooms.
A successful entry is not simply about getting inside the building. It involves securing enough surrounding space to prevent defenders from immediately isolating and eliminating the attacking players.
Attackers should identify their intended route before the action phase begins and understand how that route contributes to the eventual objective.
Choosing entry points strategically
Entry locations should be selected according to the objective, defensive setup, and team composition.
A strong entry route generally offers:
- Access to strategically important rooms.
- Opportunities for coordinated support.
- Reasonable protection against common defensive angles.
- Space for drones to investigate nearby threats.
- A clear connection to the team's primary objective.
Entering from the opposite side of the map can occasionally create valuable pressure, but it may also consume excessive time.
Executing the drone-and-entry method
A reliable approach involves separating information gathering from the actual entry.
Step 1: Investigate the entry room
Use a drone to check corners, furniture, barricades, and nearby hiding positions.
Step 2: Clear surrounding threats
Inspect adjacent rooms and corridors that defenders could use to challenge the entry.
Step 3: Establish supporting positions
Position a teammate to watch a potential flank or cover an important doorway.
Step 4: Enter and secure the room
Move into the cleared area while maintaining awareness of nearby threats.
Step 5: Advance information coverage
Use another drone or teammate to investigate the next section of the building.
This process reduces unnecessary risks and creates a controlled progression toward the objective.
Avoiding isolated engagements
An attacker entering alone may encounter multiple defenders without support.
Even if the attacker wins the first engagement, a second defender can immediately trade the elimination.
Coordinated entries create opportunities for teammates to respond when an engagement occurs.
Advanced recommendation: Maintain a practical distance between supporting players so they can trade engagements without exposing themselves to the same explosive or line of fire.
5. Controlling the Map Through Vertical Pressure and Strategic Positioning
Map control is one of the defining skills separating average Rainbow Six Siege players from highly effective tactical competitors. Controlling a room means more than physically occupying it. Players must also understand the surrounding angles, rotation routes, and destructible surfaces that influence the position.
Many maps contain destructible floors and ceilings, allowing attackers and defenders to influence engagements across multiple levels. Vertical gameplay creates opportunities to remove defensive gadgets, displace entrenched opponents, and challenge positions that are difficult to attack horizontally.
However, vertical control requires careful preparation. Opening floors without understanding the objective layout can waste time or expose teammates to unnecessary danger.
Identifying important control areas
Before attacking, determine which rooms provide tactical advantages over the objective.
Important areas may include:
- Rooms directly above defensive positions.
- Corridors connecting major sections of the map.
- Staircases used for rotations.
- Rooms overlooking reinforced walls.
- Locations controlling access to planting positions.
Securing these areas reduces the number of directions defenders can safely move.
Executing effective vertical attacks
Operators equipped with suitable destruction tools can create openings through destructible surfaces.
A structured vertical attack involves several stages.
First: Clear the upper floor
Before opening the floor, ensure defenders cannot easily attack the player performing vertical destruction.
Second: Identify important positions below
Use map knowledge, drone information, and sound cues to determine where defenders are located.
Third: Create purposeful openings
Focus on positions that protect defensive gadgets, important entrances, or likely planting locations.
Fourth: Coordinate with teammates
Vertical pressure becomes more effective when teammates simultaneously threaten defenders from another direction.
Fifth: Maintain control
Avoid abandoning the upper floor immediately after creating openings. Defenders may attempt to reclaim the area.
Understanding the risks of vertical control
Vertical destruction can reveal an attacker's position and expose them to return fire.
Additionally, opening too many surfaces may create sightlines that defenders can exploit later.
Practical tip: Prioritize a few strategically valuable openings rather than destroying large areas without a specific objective.
Effective vertical gameplay is about controlling defender movement, not maximizing environmental destruction.
6. Managing Utility and Reinforced Walls During the Mid-Round
The middle portion of a round often determines whether an attack develops into a coordinated objective push or becomes a series of disconnected engagements.
By this stage, attackers should have established some map control and gathered information about the defensive setup. The next challenge involves removing obstacles that prevent access to the objective.
These obstacles may include reinforced walls, electronic denial devices, projectile interception gadgets, traps, and defenders holding protected positions.
Prioritizing utility removal
Attackers should identify which defensive gadgets directly interfere with their intended strategy.
For example, if a reinforced wall provides the safest route toward the objective, removing the devices protecting that wall may be more important than eliminating an unrelated camera elsewhere.
A useful utility priority system is:
- Remove gadgets preventing essential breaches.
- Clear devices threatening the planned entry route.
- Neutralize utility protecting important defender positions.
- Preserve tools needed for the final objective push.
- Avoid spending valuable resources on low-impact targets.
This approach ensures that utility usage supports the overall attack.
Coordinating reinforced-wall breaches
Opening a reinforced wall often requires cooperation between several operators.
A typical sequence involves identifying electronic denial, neutralizing or bypassing it, protecting the breaching operator, and preparing to exploit the resulting opening.
However, the exact method depends on the defensive setup and the operators available.
Important tactical principle: Creating a breach does not automatically establish control.
Defenders may continue watching the opening from protected angles or use utility to delay attackers attempting to cross it.
Using utility to create movement opportunities
Utility should help attackers accomplish specific objectives.
For example:
- Smoke can obscure selected sightlines during an execution.
- Flash devices can disrupt defenders before an entry.
- Explosive utility can remove gadgets or force defenders away from positions.
- Information tools can reveal whether an area remains occupied.
- Breaching equipment can create alternative entry routes.
The strongest attacks combine these tools rather than using them independently.
Avoiding resource exhaustion
One common mistake is spending nearly every gadget before the final execution.
This leaves attackers without the tools needed to handle defenders protecting the objective.
Advanced recommendation: Before using a gadget, ask whether it is essential immediately or more valuable during the final push.
7. Executing Coordinated Site Attacks and Defuser Plants
The final objective push is one of the most demanding stages of an attacking round. Players must combine information, positioning, utility, and timing while operating under increasing pressure from the round timer.
A common mistake is waiting too long before beginning the execution. Even when attackers have established significant map control, they can lose because they lack sufficient time to clear the final defensive positions and plant the defuser.
Successful teams prepare their execution before reaching the final moments of the round.
Establishing execution readiness
Before committing to the objective, confirm that the team has established the necessary conditions.
These conditions typically include:
- Control of the primary entry route.
- Information about important defender positions.
- Protection against immediate flanking attacks.
- Enough remaining utility to support the push.
- A designated defuser carrier.
- Teammates positioned to cover the plant.
Not every condition must be perfect, but attackers should understand which risks remain.
Creating a coordinated planting sequence
A structured planting attempt usually follows a predictable sequence.
Stage 1: Establish information
Check the objective area and nearby defensive positions.
Stage 2: Apply pressure
Use coordinated positioning and utility to limit defender movement.
Stage 3: Secure planting space
Control the angles that threaten the intended planting location.
Stage 4: Begin the plant
The designated player plants while teammates provide protection.
Stage 5: Transition to post-plant positions
After planting, surviving attackers reposition to defend the defuser.
The transition between planting and post-plant defense is particularly important.
Avoiding unnecessary aggression after planting
Once the defuser is planted, the attacking team gains a different strategic advantage.
Defenders must eventually interact with the defuser to complete a disable attempt.
Attackers should therefore avoid giving defenders unnecessary eliminations.
Instead, they can maintain protected positions, monitor important approaches, and use remaining utility to delay the disable.
Advanced post-plant principle
A player holding a safe angle that prevents defenders from reaching the defuser may contribute more than a player aggressively searching for additional eliminations.
The objective is to win the round, not maximize individual statistics.
8. Building Defensive Strategies Around Information, Delay, and Rotation Control
Defending effectively requires a different approach from attacking. Defenders begin with control of the objective and must prevent attackers from completing their mission.
This advantage does not mean defenders should remain stationary throughout the round. Effective defense involves controlling important areas, delaying enemy progress, and adjusting positions as attackers gain information.
The most successful defensive teams combine strong objective protection with calculated map pressure.
Understanding anchoring and roaming
Defensive players generally perform different responsibilities depending on the selected operator and team strategy.
Anchoring
Anchors remain near the objective or important defensive positions.
Their responsibilities include:
- Protecting critical entry routes.
- Preventing safe planting opportunities.
- Managing defensive utility.
- Maintaining information around the objective.
- Supporting teammates returning from roaming positions.
Roaming
Roamers operate farther from the objective to delay attackers and challenge map control.
Their responsibilities include:
- Forcing attackers to spend time clearing rooms.
- Threatening exposed entry routes.
- Gathering information about attacking movements.
- Creating opportunities for unexpected engagements.
- Returning toward the objective when necessary.
Roaming should not become aimless movement around the map.
Using defensive rotations intelligently
Rotation routes allow defenders to move between positions without relying entirely on predictable doorways.
However, poorly designed rotations can expose the objective to attackers.
A useful rotation should:
- Connect important defensive positions.
- Support safe movement between objective areas.
- Avoid exposing teammates to unnecessary angles.
- Provide opportunities to retreat when pressured.
- Fit the team's overall defensive structure.
Managing defensive time
Time is one of the defenders' most valuable resources.
A defender who delays attackers for twenty seconds without dying can create meaningful pressure, especially when the attacking team still needs to breach walls or clear utility.
Smoke and other area-denial tools can become particularly valuable when attackers have limited time remaining.
Practical defensive tip: Avoid taking unnecessary engagements when attackers are already struggling to complete their objective before the timer expires.
9. Improving Gunfight Consistency Through Positioning, Sound, and Crosshair Placement
Although Rainbow Six Siege emphasizes tactical decision-making, mechanical skill remains essential. Players must consistently convert information advantages into successful engagements.
However, improving gunfight performance requires more than practicing recoil control. Crosshair placement, movement discipline, sound interpretation, and angle selection often determine whether a player wins an encounter before the first shot is fired.
A player with average aim but excellent positioning can frequently defeat an opponent with stronger mechanical skills.
Mastering crosshair placement
Crosshair placement refers to keeping the weapon aimed where an enemy is most likely to appear.
Players should avoid aiming at the floor while moving through rooms.
Instead, maintain an appropriate head-level position based on the expected enemy stance and the geometry of the angle.
Important habits include:
- Keeping the crosshair near likely enemy positions.
- Adjusting aim height for crouched or elevated opponents.
- Pre-aiming common defensive angles.
- Avoiding unnecessary large aiming corrections.
- Maintaining control when transitioning between targets.
Good crosshair placement reduces the distance required to move the aim during an engagement.
Understanding sound information
Sound provides valuable clues about enemy movement and activity.
Footsteps, barricade destruction, gadget deployment, and other interactions can reveal important information.
However, sound interpretation becomes more complicated when multiple floors, walls, and openings influence how audio travels.
Players should avoid treating every sound cue as an exact location indicator.
Advanced listening technique
When hearing movement nearby, combine the audio cue with map knowledge and previously gathered information.
For example, footsteps near a staircase may indicate a potential rotation, but the player should verify the threat before abandoning an important position.
Improving angle discipline
Holding an angle effectively requires understanding exposure and positioning.
A player standing too close to a doorway may expose more of their body than necessary.
Similarly, repeatedly peeking the same angle can make their movements predictable.
Effective angle discipline involves:
- Choosing positions with useful cover.
- Avoiding unnecessary exposure.
- Changing positions after revealing your location.
- Using information before challenging opponents.
- Maintaining awareness of secondary threats.
Creating a mechanical training routine
A focused practice routine can improve consistency more effectively than playing matches without specific goals.
Recommended 30-minute routine
- 5 minutes: Basic movement and crosshair positioning.
- 10 minutes: Recoil control with frequently used weapons.
- 10 minutes: Target transitions and controlled engagements.
- 5 minutes: Practicing common angles and pre-aiming positions.
Use the training modes and practice tools available in your current version of the game.
Key recommendation: Focus on accuracy and repeatability before attempting increasingly aggressive movement techniques.
10. Developing a Long-Term Improvement System for Ranked Performance
Consistent improvement in Rainbow Six Siege requires a structured process extending beyond individual matches. Players often become frustrated when their rank stops increasing, but visible rank progression does not always reflect short-term skill development.
A more productive approach involves identifying recurring mistakes, practicing specific weaknesses, and evaluating performance over a meaningful number of matches.
Players who consistently review their decisions develop stronger tactical awareness and become better at adapting to unfamiliar situations.
Analyzing mistakes after each match
Instead of focusing exclusively on the scoreboard, evaluate the decisions that influenced the outcome.
Important questions include:
- Did I gather enough information before entering?
- Did I use my operator's utility effectively?
- Was my positioning useful to the team?
- Did I communicate important enemy information?
- Did I waste time on unnecessary engagements?
- Did I contribute to objective control?
- Could I have survived longer without sacrificing team value?
These questions help identify patterns that may otherwise remain unnoticed.
Building a focused improvement schedule
A structured weekly routine can help players develop different aspects of their gameplay.
Day 1: Map knowledge
Study common entry routes, staircases, rotation paths, and objective layouts.
Day 2: Operator mastery
Practice a small group of operators and learn how their gadgets interact with common defensive or attacking strategies.
Day 3: Information gathering
Focus on drone preservation, camera usage, and communication.
Day 4: Mechanical consistency
Practice crosshair placement, recoil control, and angle management.
Day 5: Team coordination
Concentrate on supporting teammates, trading engagements, and coordinating utility.
Day 6: Competitive application
Play ranked matches while applying the concepts practiced throughout the week.
Day 7: Performance review
Review important rounds and identify the most common causes of failure.
This routine provides a balanced approach to mechanical and tactical improvement.
Tracking meaningful performance indicators
Kill-to-death ratio alone does not accurately represent a player's tactical contribution.
Other useful performance indicators include:
- Successful opening engagements.
- Survival rate during important rounds.
- Effective gadget usage.
- Successful defuser plants.
- Defensive time wasted by attackers.
- Successful trades.
- Information provided to teammates.
- Objective-related decisions.
These indicators reveal whether a player contributes consistently to winning rounds.
Adapting to changing strategies
Rainbow Six Siege evolves through operator adjustments, map changes, equipment updates, and shifting competitive strategies.
Players should remain flexible rather than relying permanently on one approach.
A strategy that works against one defensive setup may fail against another.
The ability to recognize these differences and adapt quickly is one of the most valuable competitive skills.
Final improvement principle
Develop a small collection of reliable strategies, understand why they work, and gradually expand your tactical options.
Consistency comes from making good decisions repeatedly, not from depending on occasional exceptional performances.
Conclusion
Mastering Rainbow Six Siege requires combining mechanical skill with tactical awareness, disciplined communication, and effective resource management. While accurate shooting remains important, consistent victories depend on understanding how individual decisions influence the larger objective.
The strongest attacking teams gather information efficiently, establish controlled entry routes, remove important defensive obstacles, and coordinate their final executions. Successful defenders use positioning, information denial, utility management, and calculated rotations to delay attackers and protect critical areas.
Improvement also depends on recognizing the importance of every stage of a round. Operator selection establishes available tactical options, preparation determines initial advantages, mid-round decisions shape map control, and final executions determine whether those advantages become victories.
Players should prioritize developing reliable habits instead of attempting complicated strategies before mastering the fundamentals. Preserving drones, communicating accurately, maintaining useful positions, and managing the round timer can produce meaningful improvements even without exceptional mechanical skill.
Ultimately, Rainbow Six Siege rewards players who understand that every action should serve a purpose. By consistently applying these tips and guides, reviewing mistakes, and adapting to different opponents, players can develop the tactical confidence necessary to perform more effectively in competitive matches.