
Hades Tips and Tricks: How to Turn Bad Runs Into Successful Escapes
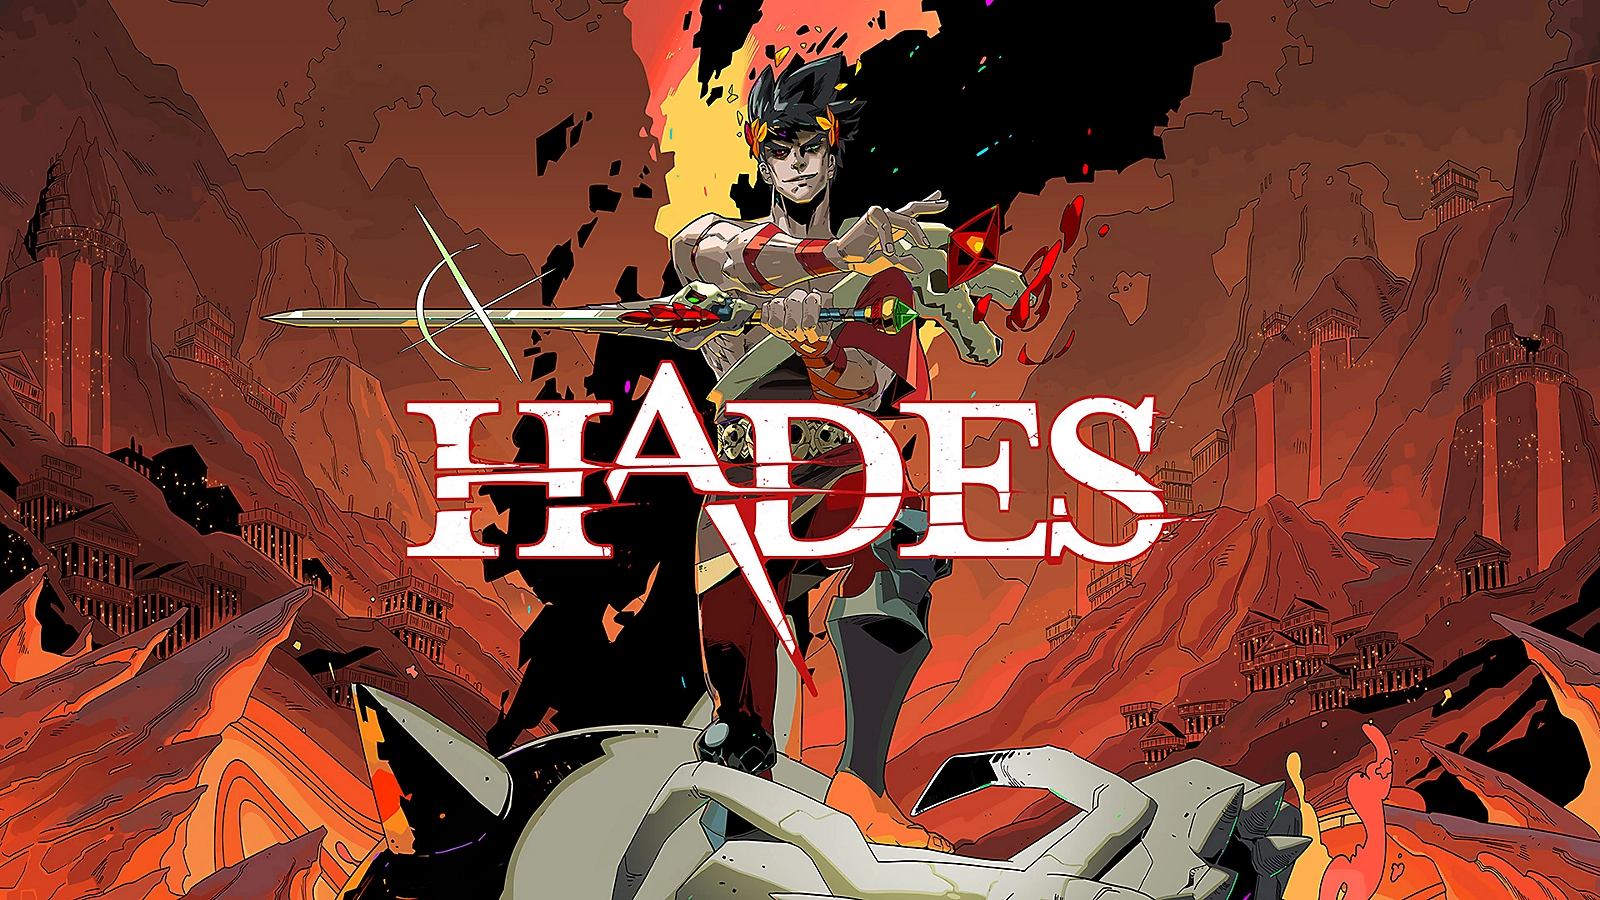
In Hades, a promising run can fall apart in seconds. You enter a chamber with nearly full health, confident that your weapon and Boons are working together, only to lose a large portion of your health to enemies you barely noticed. A few rooms later, a difficult encounter forces you to spend a Death Defiance. By the time you reach a boss, the run that once felt unstoppable has become a desperate attempt to survive.
The frustrating part is that these failures do not always happen because your damage is too low or your reflexes are too slow. Often, the problem begins much earlier: an upgrade that does not support your weapon, a dash used at the wrong moment, an unnecessary fight, or a decision to chase damage when what you really need is consistency.
Developed by Supergiant Games, Hades rewards players who learn from each escape attempt rather than simply repeating the same strategy. Its randomly generated chambers and changing combinations of divine Boons mean that no single build will solve every encounter. The key is learning how to make good decisions with the options available to you.
This guide focuses on practical ways to improve your runs, from early progression and weapon selection to combat positioning, Boon combinations, boss encounters, and resource management. Instead of relying on one supposedly unbeatable build, these tips will help you understand why certain choices work and when to change your approach.
1. Stop Treating Every Run Like a Race to the Final Boss
One of the most common mistakes new players make in Hades is judging a run entirely by how far Zagreus progresses. Reaching a new region feels like success, while dying early can feel like wasted time. That mindset overlooks one of the game's most important systems: permanent progression.
Every escape attempt can contribute to future runs. Darkness can improve Zagreus through the Mirror of Night, keys unlock additional options, and conversations at the House of Hades gradually reveal more about the characters and the Underworld. Even a run that ends before the first major boss can provide resources that make the next attempt easier.
This changes how you should approach the opening hours. Rather than forcing yourself to push forward at any cost, pay attention to what each attempt teaches you. If you repeatedly lose health to ranged enemies, practice dealing with projectiles. If a boss consistently defeats you, study its attack patterns instead of immediately blaming your weapon.
Prioritize permanent upgrades early
The Mirror of Night is one of your most valuable tools because its upgrades can benefit many future attempts. Early investments that improve survivability are especially useful while you are still learning enemy patterns.
Death Defiance is a strong priority because it gives you opportunities to recover from mistakes that would otherwise end a run. Greater Reflex, which provides an additional dash when using the relevant Mirror talent, also makes combat more forgiving. Additional health can help you survive encounters while you learn when to attack and when to retreat.
You do not need to unlock every powerful option immediately. Focus on a small number of upgrades that solve the problems you encounter most often.
For example, if you regularly reach a boss with very little health, additional survivability may be more valuable than a modest damage increase. If you survive comfortably but battles take too long, improving your damage output may be the better next step.
Measure progress by what you learn
After a failed run, ask yourself three questions:
- What caused the most damage?
- Which encounter consumed the most resources?
- Which decision would I change if I could repeat the run?
These questions turn failure into useful information. You might discover that you lose more health to ordinary rooms than to bosses, suggesting that your movement and target selection need work. Alternatively, you might realize that your build performs well against groups but struggles against single targets.
Once you identify the actual weakness, the next attempt has a clear purpose.
2. Learn to Dash With Intention Instead of Panic
The dash is one of the most important abilities in Hades. It helps Zagreus reposition, avoid attacks, cross dangerous areas, and maintain pressure on enemies. Yet many players use it almost automatically, dashing whenever they see an enemy move or an attack begin.
Constant movement may look impressive, but movement without a plan can put you directly into danger.
A dash is most effective when you understand what you are trying to avoid and where you want to end up. Escaping an attack is only half the decision. The other half is choosing a position from which you can safely continue fighting.
Dash through danger only when it creates an advantage
In many encounters, dashing through an enemy can be more useful than moving directly away from it. It may place Zagreus behind the target, create an opportunity for a backstab, or let you avoid a projectile while remaining close enough to counterattack.
However, this is not a universal rule. Some attacks cover large areas, and some enemies are dangerous at close range. Dashing toward an opponent without understanding its attack pattern can turn a defensive action into a mistake.
Try to recognize three things before you dash: the direction of the incoming attack, the space it will occupy, and the safest position available afterward.
Against a slow melee enemy, crossing behind it may create an opening. Against a ranged enemy, moving toward cover or closing the distance may be more effective. Against a boss preparing a large area attack, the best answer may simply be to move outside the danger zone.
Avoid wasting every dash immediately
Your dash can help you avoid consecutive attacks, but spending all your movement options at once leaves you with fewer ways to respond when the next threat appears.
Imagine entering a chamber filled with several enemies. You dash toward the first target, dash again to chase another, and use your remaining movement to avoid a projectile. A second enemy begins preparing an attack, and you have no comfortable way to reposition.
A more controlled approach is to use one dash to create an opening, attack during that opening, and reserve additional movement for the next threat.
You will not always be able to follow this pattern perfectly. Crowded rooms and fast enemies demand improvisation. Nevertheless, thinking of dashes as limited tactical opportunities rather than an animation to repeat continuously can make combat feel significantly more manageable.
Practice a simple attack-and-reposition rhythm
A useful beginner habit is to attack briefly, reposition, and attack again. With weapons that reward close-range combat, this rhythm helps you avoid standing still while enemies prepare their attacks.
The exact timing depends on your weapon. A fast weapon may allow several strikes between movements, while a slower weapon may require you to commit more carefully. Learn how long your chosen attack takes and recognize when the animation leaves you vulnerable.
The goal is not to dodge constantly. It is to attack during safe windows and move before those windows close.
3. Choose a Weapon That Matches Your Current Problem
Each Infernal Arm changes the way Zagreus approaches combat. Some reward close-range aggression, some allow safer attacks from a distance, and others require more deliberate positioning or timing.
A weapon that feels weak in one encounter may become extremely effective in another situation. Instead of asking which weapon is universally strongest, ask which weapon helps you handle the challenges you find most difficult.
Use the Stygian Blade to learn combat fundamentals
The Stygian Blade is a straightforward starting point for learning basic combat. It encourages you to understand attack range, enemy positioning, dash timing, and the importance of recognizing openings.
Its close-range style also exposes poor positioning quickly. If you repeatedly take damage while using the Blade, pay attention to whether you are attacking for too long or approaching enemies before their attack animations finish.
Do not assume that every opening is an invitation to use your entire attack sequence. Sometimes a single hit followed by a reposition is the safer choice.
Consider the Shield of Chaos if survival is your biggest concern
The Shield of Chaos offers a different approach, including the ability to block while charging its attack and a Special that can strike enemies from a distance.
These characteristics can be useful when projectile-heavy encounters are giving you trouble or when you need a weapon that offers more defensive flexibility. Its ranged Special also allows you to apply pressure without always standing directly beside your target.
The important lesson is to use the Shield's defensive strengths deliberately. Blocking is valuable when it answers a dangerous attack, but constantly waiting behind your shield can make encounters unnecessarily slow. Look for opportunities to defend, counterattack, and reposition rather than remaining passive throughout the fight.
Try the Heart-Seeking Bow if you need more control over distance
The Heart-Seeking Bow lets you attack from range, making it useful for players who struggle with close-range enemies or crowded encounters.
However, range does not automatically mean safety. Charging attacks can leave you vulnerable if you begin aiming while enemies are already approaching. You must still pay attention to enemy movement and know when to interrupt your attack plan.
The Bow rewards players who can recognize safe firing windows. If you find yourself repeatedly taking damage while charging, move earlier, choose a better position, or shorten the time you spend trying to line up the perfect shot.
Experiment instead of forcing yourself to use one favorite
As you unlock additional weapons and weapon aspects, experiment with different approaches. A weapon that initially feels awkward may become more effective once you understand its rhythm or find Boons that complement it.
There is also a practical progression benefit to learning several weapons. Different weapons can encourage different habits, expose weaknesses in your playstyle, and give you alternatives when a particular combat approach is not working.
You do not need to master every weapon immediately. Choose one for a few runs, identify what it does well, and then switch when you have a specific reason to experiment.
4. Build Around One Main Source of Damage
Boons are among the most exciting parts of Hades. Each offer can make Zagreus stronger, introduce a new effect, or change the way a weapon behaves. The temptation is to choose whichever option sounds most powerful in isolation.
That is how many runs end up with a collection of useful abilities that never become a coherent build.
A stronger approach is to decide which part of your combat style should carry most of your damage, then select upgrades that support it.
Decide what your weapon needs before choosing a Boon
Suppose you are using a weapon that deals frequent, relatively quick attacks. An effect that activates on repeated hits may be especially useful because you can apply it consistently.
Now imagine using a slower attack that delivers a large amount of damage in one strike. An upgrade that increases the damage of each individual hit may be a better fit.
The same principle applies to Specials and Cast abilities. If you rarely use your Special, an upgrade that improves it may not contribute much to your actual performance. If your Special is the main reason you chose a weapon, however, strengthening it can be central to the entire run.

Before selecting a Boon, consider three questions:
- Which action do I use most effectively?
- Which upgrade will improve that action?
- What weakness will remain after I choose it?
This helps you evaluate Boons by their practical impact rather than their descriptions alone.
Do not spread your upgrades too thinly
A common mistake is upgrading Attack, Special, Cast, and several secondary effects without giving any one of them enough support to become truly effective.
Versatility has value, especially when a run offers unusual combinations. But early on, a focused build is often easier to understand and use.
For example, if your Attack already has a strong damage-enhancing Boon, further investment in that Attack may provide more immediate value than taking a random upgrade for a button you rarely press.
This does not mean you should ignore every other ability. You still need ways to handle different enemies, and defensive or utility effects can make a major difference. The principle is to give your build a clear center rather than treating every available upgrade as equally important.
Let the weapon determine the build
A Boon that is excellent for one weapon may be mediocre for another.
An effect that triggers repeatedly can become valuable on a fast-hitting move. A powerful single-hit bonus may be better suited to slower attacks. A defensive effect may be particularly useful on a weapon that forces you to remain close to enemies.
The best build is therefore not simply a list of high-ranking Boons. It is a combination that works with the weapon you actually have.
5. Read the Door Rewards Before Choosing Your Next Chamber
The Underworld's branching paths offer an important advantage: you can often see the reward associated with a chamber before entering it.
This information gives you some control over a run even when the chamber layout and reward choices are randomized. You may not be able to choose every Boon you want, but you can often decide whether to prioritize a resource, improve your build, or recover health.
Choose rewards according to your current needs
Different rewards serve different purposes. Darkness helps fund permanent Mirror upgrades, keys unlock progression options, and Boons can improve your current run. Other rewards can restore health, provide currency, or modify your weapon.
The right choice depends on your situation.
If you are still unlocking important Mirror talents, a path offering permanent progression resources may be worthwhile. If your build is struggling to deal enough damage, a chamber that offers a suitable Boon could be more valuable. If you have lost substantial health, a route with a realistic opportunity to recover may be safer than chasing a minor offensive upgrade.
Avoid treating any reward as automatically superior. A resource you need now can be more valuable than a powerful option that does not address your current problem.
Plan one or two rooms ahead
You do not need to predict an entire escape attempt. Instead, consider what your build needs in the immediate future.
If you have a strong Attack but a weak Special, a path that might improve your Special could help round out your options. If you already have sufficient damage but very little health, prioritizing survival may be the wiser decision.
This short-term planning prevents you from choosing rewards based only on what looks exciting in the moment.
Know when to take a risk
Some choices offer the potential for greater rewards but come with an additional cost or danger. Whether that risk is worthwhile depends on the state of your run.
If your health is high, your build is functioning well, and you have enough defensive resources, a riskier option may be reasonable. If you are close to losing a life and have no reliable way to recover, the same choice may be unnecessarily dangerous.
A useful rule is to evaluate risk according to what you can afford to lose, not simply what you might gain.
6. Use the Mirror of Night to Fix Weaknesses, Not Just Increase Numbers
The Mirror of Night can dramatically influence how a run feels. Its talents improve Zagreus in different ways, and some upgrades are especially valuable while you are still learning the game.
However, spending Darkness without considering your playstyle can lead to upgrades that look useful but do not solve your most pressing problems.
Invest in survivability before chasing perfection
Death Defiance can give you another opportunity to continue after a fatal mistake. Additional health makes individual encounters more forgiving, while an extra dash can improve both offense and defense.
These upgrades are valuable because they reduce the punishment for mistakes. They allow you to learn enemy patterns without every unsuccessful experiment immediately ending a run.
Once your survival becomes more consistent, you can place greater emphasis on offensive improvements or alternative talents that support a specific strategy.
Understand the difference between a safety upgrade and a damage upgrade
A damage upgrade helps you defeat enemies faster. A defensive upgrade helps you remain alive long enough to do so.
Neither is universally better. If a boss takes too long to defeat and you rarely get hit, additional damage may be the obvious choice. If you regularly lose a large portion of your health during ordinary encounters, improving your ability to survive may produce better results.
Do not measure an upgrade only by the number displayed in its description. Consider how often it will help during an entire escape attempt.
Revisit your choices as your skills improve
A build that is useful during your first attempts may not remain your preferred setup forever. As you learn to avoid attacks, recognize safe openings, and create stronger Boon combinations, you may find that you can afford to invest more heavily in offense.
Experiment with the Mirror's alternate talents when they become available. Different combinations can support different approaches, and discovering what works for you is part of the game's long-term progression.
7. Use Keepsakes to Give Your Run a Direction
Keepsakes provide another way to influence an escape attempt. They can offer defensive benefits, improve your resources, or help shape the Boons available to you.
Instead of selecting one randomly, consider what your next run is supposed to accomplish.
Choose a defensive Keepsake when you need more room to learn
Cerberus's Old Spiked Collar increases your maximum health, making it a useful option when you need a larger margin for mistakes.
Skelly's Lucky Tooth can provide an additional chance to survive a fatal encounter when its effect is available. It is particularly useful if you frequently reach a difficult fight with too few opportunities to recover.
These Keepsakes do not eliminate the need to learn enemy patterns. They give you more opportunities to practice them.
Use god Keepsakes when you want a more focused build
A Keepsake associated with an Olympian can help steer the run toward that god's Boons. This is useful when you already have a plan for your weapon and want to improve the chance of finding an effect that supports it.
For example, you might want a particular god's Attack Boon because it complements your weapon's hit pattern. Equipping the appropriate Keepsake at the start can help you begin building around that direction.
However, do not confuse a more predictable opening with a guaranteed build. Your later choices still depend on which rewards appear and how the run develops.
Change Keepsakes between regions when appropriate
Keepsake selection is not always a decision you make once and keep forever. Where the game allows you to change your Keepsake between regions, consider whether your current one is still providing enough value.
An item that helps establish your opening build may be less important after you have acquired the key Boons you need. A defensive Keepsake may become more attractive before a difficult encounter.
Think about what the next section of the escape demands rather than following one fixed rule for every run.
8. Stop Ignoring Your Cast
During a crowded fight, it is easy to focus entirely on Attack, Special, and Dash. The Cast can become an ability you remember only when you see its icon or notice that an enemy is particularly difficult to defeat.
That habit leaves useful damage and tactical options unused. The Cast can contribute damage, apply effects through certain Boons, and help you handle tougher enemies when combined with the right upgrades. Its value depends on your build, but it should not automatically be treated as a secondary ability that can be ignored.
Use Cast to support your main strategy
Some Boons make Cast more effective or change how it functions. Depending on the build, it may provide useful burst damage, area control, or additional pressure against a single target. You do not need to build around Cast every run. Instead, understand what role it can play in your current setup. If your main weapon handles groups effectively but struggles against a durable enemy, a useful Cast upgrade may help fill that gap. If you have already invested heavily in Cast damage, it may deserve more attention than your ordinary Attack.
Remember that abilities can complement one another
A successful build is not always about maximizing a single action in isolation. Sometimes, the best results come from using abilities together. You might apply an effect with one action, then use your primary attack to exploit the opening. You might use Cast to pressure a dangerous target while moving into a better position. The exact combination depends on your Boons and weapon. The practical lesson is simple: develop the habit of using your available tools. A strong ability that remains unused contributes nothing to the encounter.
9. Focus on One Dangerous Enemy at a Time
Many chambers become difficult because several enemies attack simultaneously. Projectiles cross the room, melee enemies close the distance, and Zagreus can quickly lose control of his position.
When this happens, it is tempting to attack whichever enemy is closest. That is not always the best target.
A dangerous ranged enemy may continue attacking from the edge of the room while you focus on a less threatening opponent. Another enemy may be preparing an attack that forces you to abandon your current position. Allowing every opponent to remain active can make the encounter harder than it needs to be.
Identify which enemy is creating the most pressure
Before committing to a target, look at the room as a whole. Ask which enemy is most likely to damage you if left alone. Depending on the encounter, the answer might be a ranged attacker, an enemy that creates hazards, or a fast opponent that repeatedly interrupts your movement. Removing that threat can make the remaining fight much easier, even if it is not the enemy with the lowest health.
Avoid chasing targets into dangerous positions
An enemy that moves away from you can tempt you to follow it immediately. But pursuing a target through projectiles, traps, or other enemies can cost more health than the damage you gain. Sometimes it is better to reposition first, allow the enemy to approach, or clear a safer path before attacking. Good target selection is not simply about deciding whom to hit. It is about deciding where and when to fight.
Learn when to stop attacking
If an enemy begins a clearly telegraphed attack, finishing one more strike may not be worth the damage you risk taking. New players often lose health because they become committed to completing an attack sequence. They know an enemy is about to strike, but they continue attacking because the target is nearly defeated. Breaking that habit is one of the simplest ways to improve consistency. An enemy with very little health can still hurt you. Survive the attack, then finish the fight.
10. Treat Boss Fights as Pattern Recognition Tests
Bosses in Hades can appear overwhelming because their attacks cover large areas, deal substantial damage, and punish mistakes more severely than ordinary enemies. The solution is not necessarily to attack faster. It is to understand the boss well enough to recognize when it is safe to deal damage.
Watch for attack tells
Bosses often communicate their intentions through animations, positioning, or a recognizable sequence of actions. Learning these signals allows you to anticipate danger rather than reacting after an attack has already begun. During an unfamiliar boss fight, spend some attention observing what happens before each major attack. Notice how the boss moves, where the danger appears, and how long the opening lasts afterward. You may not defeat the boss immediately, but the information will help on your next attempt.
Do not attack through every opening
A boss may pause after a large attack, giving you an opportunity to strike. That does not mean you should use every available ability without considering what comes next. If you spend too long attacking, you may be caught by the next pattern. Learn how much damage you can safely deal before repositioning. This is particularly important when using slower weapons or charging attacks. Your damage output matters, but only if you can deliver it without repeatedly sacrificing health.
Preserve resources for the fights that need them
If you know a difficult encounter is approaching, consider whether you can afford to spend health, healing opportunities, or limited defensive resources in the rooms before it. This does not mean playing timidly throughout the entire run. It means recognizing that resources have different value at different points. A small amount of health lost in an easy room may seem insignificant. Repeated losses across several chambers, however, can leave you with little margin when a boss demands sustained concentration.
11. Make Better Decisions in the Shop
Charon's shop can offer useful items and upgrades, but spending currency without a plan can leave you unable to afford something more valuable later. Before buying an item, consider what problem it solves and how much of the run remains.
Prioritize immediate needs
If you are low on health and approaching a difficult encounter, recovery may be more valuable than a modest offensive improvement. If your health is comfortable but your build lacks damage, a useful upgrade may have a greater impact. The key is to evaluate purchases in context rather than automatically choosing the item with the most attractive description.
Be careful with limited currency
Obols are generally tied to the current escape attempt, so hoarding them indefinitely is not a reliable long-term strategy. If you have an opportunity to purchase something that significantly improves your chances, there may be little reason to finish the run with unused currency. Still, spending everything immediately is not always ideal. Compare the available choices and consider whether an item offers meaningful value for the challenges ahead. A small purchase that barely affects your build may be less useful than saving for a stronger upgrade later in the same run.
12. Do Not Waste Your First Nectar Gifts
Progression in Hades is not limited to combat. The characters in the House of Hades can offer Keepsakes, conversations, and additional story developments as your relationships progress. Nectar is therefore more than another collectible. Giving it to characters can unlock useful rewards, and choosing whom to gift first can make your early attempts more comfortable.
Prioritize rewards that match your needs
If you want extra survivability, consider gifting Nectar to characters who provide Keepsakes that improve health or offer another chance to survive a fatal encounter. If you are already comfortable surviving ordinary rooms, you might prefer to experiment with Keepsakes that help steer your build toward particular Boons. There is no need to turn every gift into a complicated optimization problem. Choose a reward that supports your current goals, then explore other characters as you collect more Nectar.
Talk to characters after returning
The House of Hades is not merely a place to spend resources before starting another run. Conversations can change after important events, deaths, and progression milestones. Make a habit of checking in with characters when you return. You may discover new dialogue, additional context, or opportunities to advance a relationship. This is particularly worthwhile because the story is woven into the game's repeated escape attempts. Returning to the House is part of the experience, not just a pause between combat encounters.
13. Use the Codex to Understand What You Have Discovered
As you progress, Hades introduces a growing number of characters, enemies, and systems. Remembering every detail can become difficult, especially when a run presents several unfamiliar options in quick succession.
The Codex of the Underworld is a useful reference for keeping track of discoveries and learning more about the game's world.
Rather than trying to memorize everything immediately, use the Codex when you need to check information or understand what you have encountered.
This is especially helpful when you want to learn more about the characters and their relationships. The game's narrative develops over repeated attempts, and the Codex can help you keep track of details that might otherwise become lost among the action.
14. Learn When a Risky Reward Is Actually Worth Taking
Some of the most interesting decisions in Hades involve accepting a temporary disadvantage in exchange for a potentially valuable reward. These choices can improve your build, but their value depends on whether you can manage the risk. A powerful upgrade is not necessarily a good choice if the cost makes the next several rooms significantly harder.
Evaluate the cost, not just the reward
Before accepting a risky option, think about your current health, the state of your build, and the kind of encounters you expect to face. If your weapon already deals strong damage and you have reliable defensive tools, you may be able to absorb a temporary disadvantage. If your build is fragile and you are struggling to clear ordinary rooms, the same risk could make the run unnecessarily difficult. You do not need to avoid every dangerous choice. You need to understand what you are trading away.
Consider whether the reward improves the whole run
Some upgrades provide immediate benefits, while others become more valuable when combined with future Boons. Think about whether the reward fits your existing strategy and whether you have enough time left in the run to benefit from it. An upgrade that supports your main source of damage can be more useful than one that introduces an entirely new mechanic without helping your current build.
15. Use God Mode If You Want to Focus on Learning the Game
Hades can be demanding, especially if you are new to action games or struggle with fast combat. Repeated deaths can make progression feel slow, and frustration can prevent you from enjoying the story or experimenting with the game's systems. God Mode is an optional setting designed to make the experience more forgiving. It increases Zagreus's damage resistance as you die repeatedly, allowing you to progress while continuing to learn the combat. Using it does not mean you have failed to understand the game. It simply changes the balance between challenge and accessibility. If you want to focus on the story, explore character relationships, or learn weapon mechanics without facing the same difficulty curve, God Mode is a legitimate option. You can also choose to play without it if mastering the combat is part of what makes the experience rewarding for you. The important thing is to choose the experience you want rather than treating difficulty as a measure of whether you are playing correctly.
16. Build a Simple Plan Before Each Escape Attempt
A run becomes easier to manage when you begin with a clear idea of what you want to improve. This does not mean predicting every Boon or planning an entire build before seeing the available rewards.
Instead, choose one primary goal and let your decisions support it. For example, you might decide that your next attempt is about improving survival. You will pay more attention to enemy attack patterns, prioritize defensive opportunities, and avoid unnecessary damage. On another attempt, you might focus on building around a weapon's Special. You will look for Boons that improve it, choose rewards that support the build, and practice positioning that lets you use the ability safely. This approach makes each run more informative. If you succeed, you learn what works. If you fail, you can identify whether your plan was effective and where it broke down.
A practical checklist before entering a chamber
Before committing to an encounter, quickly consider the following:
- Health: Can I afford to take damage here, or do I need to play more cautiously?
- Enemies: Which opponent is likely to create the most danger?
- Position: Where can I move without trapping myself near hazards?
- Build: Which ability should deal most of my damage?
- Resources: Is there a reason to save a limited resource for later?
You do not need to pause and consciously answer every question during every fight. With practice, these checks become habits that help you make better decisions automatically.
17. The Biggest Mistake: Repeating a Failed Strategy Without Changing Anything
It is easy to finish a run, return to the House of Hades, and immediately begin another attempt with the same approach. The game's fast pace encourages repetition, and the next escape always offers the possibility of a better result. But repetition alone does not guarantee improvement. If you repeatedly lose health because you attack for too long, a new weapon will not automatically solve the problem. If your build lacks focus, collecting more Boons may only give you more unrelated abilities. If a boss keeps defeating you with the same attack, simply dealing more damage may not prevent the next failure. The most useful change is often a small one. Spend a run learning a boss's attack patterns. Practice using the dash to reposition rather than escape blindly. Choose a single damage source and build around it. Invest in an upgrade that directly addresses your most frequent mistake. These adjustments may not produce an immediate victory, but they make each attempt more meaningful.
18. A Beginner-Friendly Strategy for More Consistent Runs
If you are unsure where to begin, use the following approach as a flexible starting point rather than a strict build guide. During the early stages of progression, collect resources that help unlock useful permanent upgrades. Invest in survivability and movement options that give you more opportunities to learn. Experiment with the available weapons until you find one whose range and attack rhythm feel comfortable. Once you enter a run, choose a primary source of damage and look for Boons that strengthen it. Use door rewards to address your current weaknesses rather than selecting paths randomly. Equip a Keepsake that provides useful protection or helps establish your intended build. During combat, focus on recognizing enemy attacks and choosing safe openings. Avoid spending every dash immediately, prioritize dangerous enemies, and remember that surviving a room with more health is often more valuable than finishing it a few seconds faster. When you return to the House of Hades, spend your resources thoughtfully, speak with characters, and review what caused the run to fail. Most importantly, change one thing at a time. This makes it easier to understand which decisions improve your results.
Final Thoughts
The secret to improving at Hades is not discovering one perfect weapon, one unbeatable combination of Boons, or one trick that makes every boss easy. The game is designed around changing circumstances, and the strongest players are those who adapt to the options available.
Learn when to attack and when to move. Choose upgrades that support your weapon. Use Keepsakes to shape your run, treat permanent progression as part of the journey, and study enemies instead of rushing through every encounter.
A failed escape does not need to be wasted. It can reveal a weakness in your build, expose a bad habit, or teach you how to respond to an attack that once seemed impossible to avoid.
Over time, the Underworld becomes less unpredictable. You begin to recognize familiar patterns, make decisions more confidently, and understand why certain combinations work better than others.
And when Zagreus finally reaches the end of a run that once seemed beyond your ability, the victory feels earned not because you found a shortcut around the game's challenges, but because you learned how to overcome them.